Monday, January 24, 2011

Fire

We will create a simple fire


1. Start off with a new document, size doesn't matter.
Grab your paint bucket tool and fill your document with black.

2 .Now make your foreground color white. Select your pencil tool and select the brush to be 9 px, now draw a straight white line almost at the bottom

3. Select your smudge tool and make your brush about 19 px then smudge the line upwards

4. Now it's time to color the fire, click adjustment layer>color balance, adjust the slider.

5. Duplicate your current layer, and now you can choose freely which style you like. Set your blending option to either color burn, linear burn, color dodge, linear light or vivid light.

Liquify Filter

In this tutorial you will learn how to create a liquify image


1. Open Photoshop. Open an image to apply Liquify.


2. Filter > Liquify

3. This will open the Liquify dialogue box.

4. By default, the Warp Tool is selected if not, select the following Warp Tool at the top left of the dialogue box.


5. Input 25 for brush size and 70 for brush pressure


6. Place the cursor on the Toe of the left shoe and drag it slightly towards right.

7. Place the cursor on the Toe of the right shoe and drag it slightly towards left.

8. Click OK and save the image.


Saturday, January 22, 2011

TEXT EFFECTS

Creating a TEXT EFFECTS


In this tutorial you will learn how to create a text effects.


Step 1:

Create a document,make it 1000px & 1000px.

Step2: Fill your background with black. Go to EDIT>FILL>CONTENTS>BLACK or simply shift+f5>contents>black.

Step3: Using type tool write your name, adjust the way you like it.

Step4: Using smudge tool, make it look like in fire.

Step5: Under your layers palette, click the adjustment layer>color balance, adjust the color balance. and the tone balance.

Step6: Now, get another text just like the 1st one. and drag the text over the 1st one. Set the blending mode to overlay.


Friday, January 21, 2011

CHANGING THE COLOR OF YOUR HAIR USING PHOTOSHOP

HOW TO CHANGE THE COLOR OF YOUR HAIR


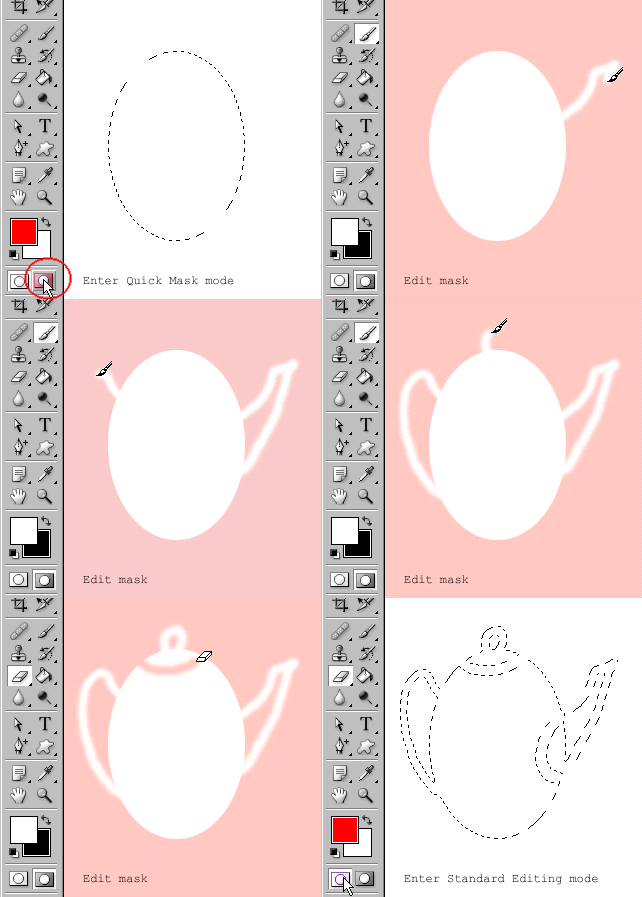
In this tutorial you will learn how to change one's color hair using quick mask mode and hue/ saturation.


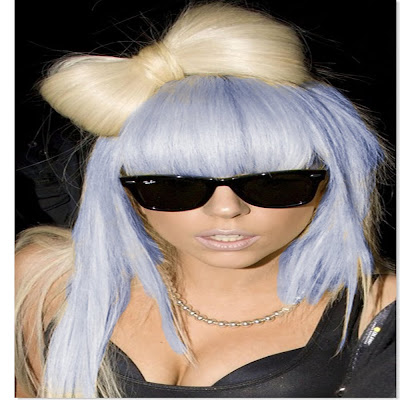
In this lesson we will be using the image below:


First open the image of your choice like the above. Open a new document which will serve as our file. Click RECTANGULAR MARQUE TOOL and make a selection with the image,copy and paste it in your the newly open file. You now have your LAYER1.

After having a new layer enter the image into a quick mask mode which is located under your foreground and background color.


Next we have to use your brush tool, make sure you have choose a soft brush. Try to choose a selection which will be changing. After selecting an image. get out of quick mask mode.

After that you van see that some of the images has been selected. Copy the selected images and open a new layer.

Press CTRL+U (which is for hue/saturation) adjust the slider to your choosen color.


Using The Red Eye Tool

Basic red eye removal


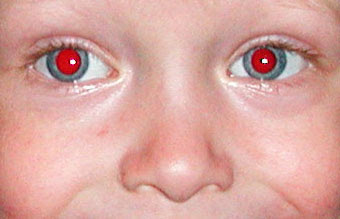
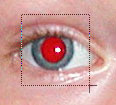
For this tutorial we're going to use the following image:


Step 1 : Open this picture in Photoshop.

Step 2: Duplicate the Background layer by dragging/dropping its thumbnail onto the Create a new layer icon Create a new layer icon or you can just simply click layer>new>layer via copy.

Step 3: Select the Red Eye tool Red Eye tool in the tool bar.

With the tool selected use the following settings in the options bar:

Pupil Size: 50%
Darken Amount: 70%:


Step 4: Make sure that the Background copy layer is the active layer (it will have a blue background in the layers palette):

Step 5 :
Now remove the red in each eye by making a rough selection.


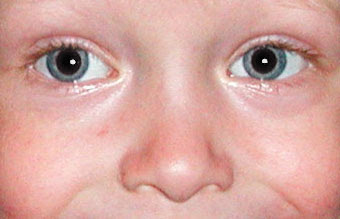
Step 6: There you have your photo without a red eye.

ADDING A MOON ON A PHOTO


In this tutorial you will learn on how to add a moon to a photo.


Step 1

Open an image of a moon that you will put in the photo. ( Any image of moon will do.)

Step 2

Click the RECTANGULAR MARQUE TOOL

Step 3

Make a selection with the image.

Step 4

Press Ctrl+C in your keyboard.

Step 5

Open an image you want to add your image 1 (moon)

Step 6

Press Ctrl+V in your keyboard.

Step 7

Position he moon in the photo.

Step 8

Change the blending mobe of the layer to SCREEN.

Step 9

Press enter.


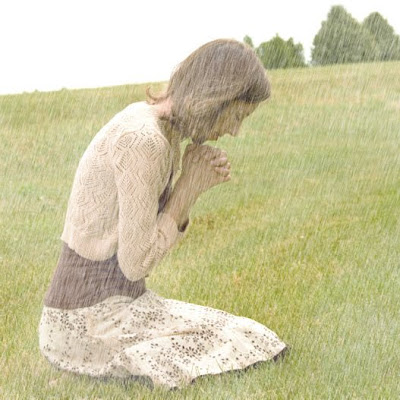
RAIN EFFECTS USING PHOTOSHOP

Rain Effect


In this tutorial we'll learn how to create an artificial rain.


Step 1

Open an image. Add a new layer by clicking on the fifth icon below the layers panel. A new layer is created with the name 'layer 1' and your previous layer would have the name 'background'

Step 2

With the new layer selected click on Filter>Render>Clouds. Change the Opacity to 60. (This is present on the top right of the layers panel)

Step 3

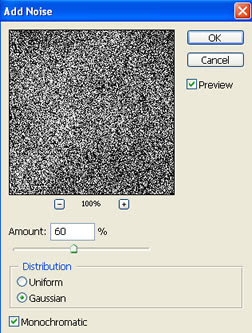
Click on Filter>Noise>Add Noise.

Amount - 60

Distribution - Gaussian

Check Monochromatic


Step 4

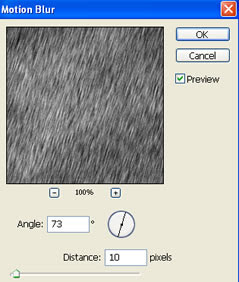
Click on Filter>Blur>Motion blur. The Motion blur window appears. Give the values Angle - 73 and Distance 10


Step 5

With 'layer 1' still selected, move your mouse over the Layers panel. There is a drop down menu on the top left of the panel, this is used to set the blending mode for the layer, now set the blend mode to 'screen'.

Tuesday, January 18, 2011

how to change the color of your eyes using photoshop?


This tutorial is to help you learn how to change the color of someone’s eyes in a photo using photoshop.


1. Select the Lasso Tool from the toolbar.

2. Carefully select the first eye with the Lasso Tool by dragging the tool around the eye with the mouse button held.


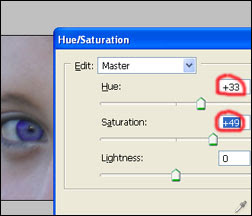
3. Then once you have selected, go to (Image>Adjustments>Hue/Saturation) and check the box colorize.

4. Adjust the Hue and Saturation until you find a new color for the eyes that you like.