Rain Effect
In this tutorial we'll learn how to create an artificial rain.


Step 1
Open an image. Add a new layer by clicking on the fifth icon below the layers panel. A new layer is created with the name 'layer 1' and your previous layer would have the name 'background'
Step 2
With the new layer selected click on Filter>Render>Clouds. Change the Opacity to 60. (This is present on the top right of the layers panel)
Step 3
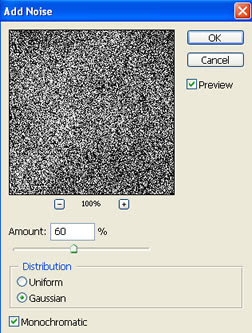
Click on Filter>Noise>Add Noise.
Amount - 60
Distribution - Gaussian
Check Monochromatic

Step 4
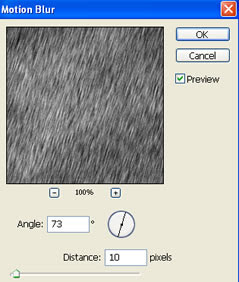
Click on Filter>Blur>Motion blur. The Motion blur window appears. Give the values Angle - 73 and Distance 10
 Step 5
With 'layer 1' still selected, move your mouse over the Layers panel. There is a drop down menu on the top left of the panel, this is used to set the blending mode for the layer, now set the blend mode to 'screen'.

No comments:
Post a Comment